If you have been granted access to the Time Clock View, you will be able to add timesheet entries. There are two methods to enter a new timesheet record:
- Method 1: Use a Time Clock
- Method 2: Create Timesheets Manually
- Method 3: Add Timesheets from the Job Details Page
Method 1: Use a Time Clock
Using the time clock feature, you will be able to accurately report time based on a series of clock in and clock outs. Depending on the setting configured by your admin, you maybe able to clock into different jobs and/or task types.
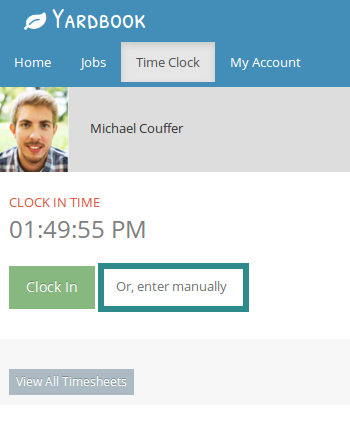
To access the Time Clock page, first log into your Yardbook account. Then click on the “Time Clock” tab near the top of the page. (If you are an Admin, you can directly access the Time Clock page from your Sitemap)
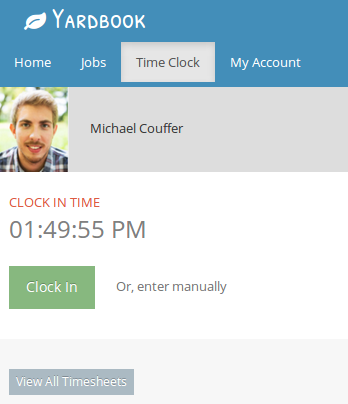
Then click “Clock In”. This will open a list options for which you can clock into. (Ex. task types and/or jobs).

Select an option by clicking on a button to clock in.
Now you will see that you’ve been clocked into the task/job.
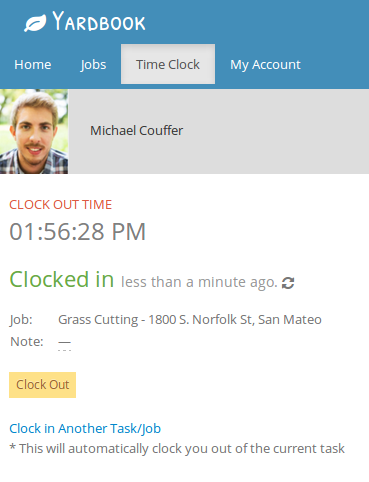
Once you are done with the current job, click on the “Clock out” button to clock out.
Now you’ll see the timesheet entry recorded in the “Earlier Today” section of the page.

Alternatively, if you are planning to clock into a different task/job, you can click on the “Clock into another task/job” link. This will automatically clock you out of the current timesheet and clock into a new task/job.
Method 2: Create Timesheets Manually
The second method gives you the ability to manually add a timesheet and record the number of hours, without using the time clock. (Note: You will not be able to track the start and end time using this method. )
First log into your Yardbook account. Then click on the “Time Clock” tab near the top of the page. (If you are an admin, you can directly access the Time Clock page from your Sitemap)
Instead of “Clock in”, click on the “Enter manually” link.
This will take you to the add a timesheet entry page.
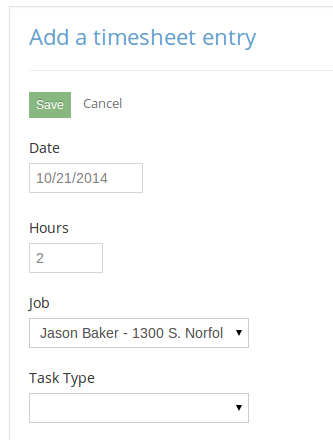
Simply enter the number of hours, and choose a task type or job, and hit “Save”.
Now you have added a new timesheet.
* Please note that Admins will be able to tell which timesheets are created/updated manually since the clock in time and clock out time will be blank.
Timesheet Entry Formats
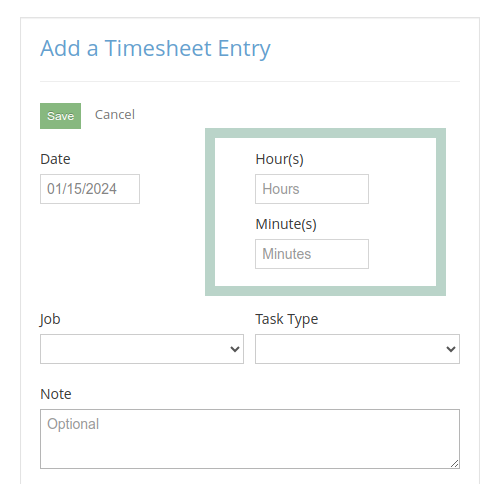
A popular enhancement request for the timesheet feature has been the ability to add timesheets in hours and minutes, instead of just a decimal number. For example, it’s much easier to enter 1 hour and 10 minutes than having to figure out that’s 1.17 hours. With our latest enhancement, you have the ability to use either format.
To use the new option, navigate to the New Timesheet View, and click on the “I’d like to enter hours using 2 separate fields: hours & minutes” link near the bottom of the page.

Once you’ve enabled this option, you’ll have 2 fields to enter hours and minutes separately.
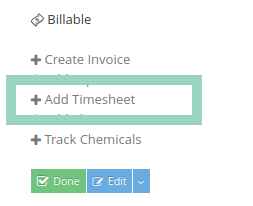
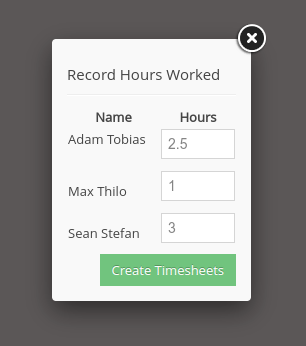
Method 3: Add Timesheets from the Job Details Page
You can add one or more timesheets directly on your job page.