Being able to create efficient job routes saves both time and money for your landscaping business. Yardbook’s routing feature helps you create routing sheets based on the jobs you already have in the system. It gives you the ability to optimize your routes, finding the shortest total driving time, and allows you full-control over your routes through easy to use drag and drop interface.
In this tutorial, we’ll cover the following topics:
- Create a single routing sheet
- Configure your route
- Optimize your route
- Print/email route sheets
- Set up starting/ending locations
- Configure your route settings
- Manage multiple route sheets
- View all routes
- Improve routing across multiple days (NEW)
- Fix incorrect Geocodes
Create a Routing Sheet
To create a new route is easy. Simply navigate to your Jobs view, and click on the ‘Route’ link on the upper right of the screen. This will take you to the route screen, where you will see a list view of all your jobs on the left side of the page.
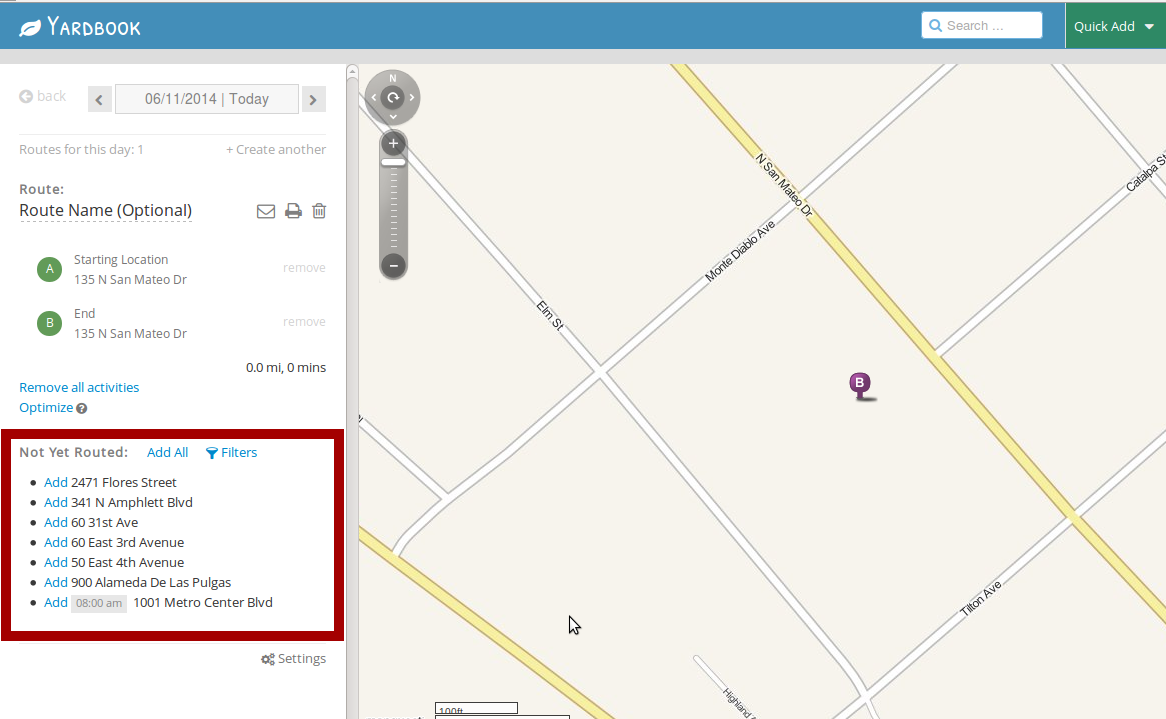
Add Jobs to Route
Click on the ‘Add All’ Link at the top of the list to make these Jobs part of your new Route. You will see that the Jobs have now moved from the ‘Not Yet Routed Section’ up to the top ‘Route’ area.
Configure Your Route
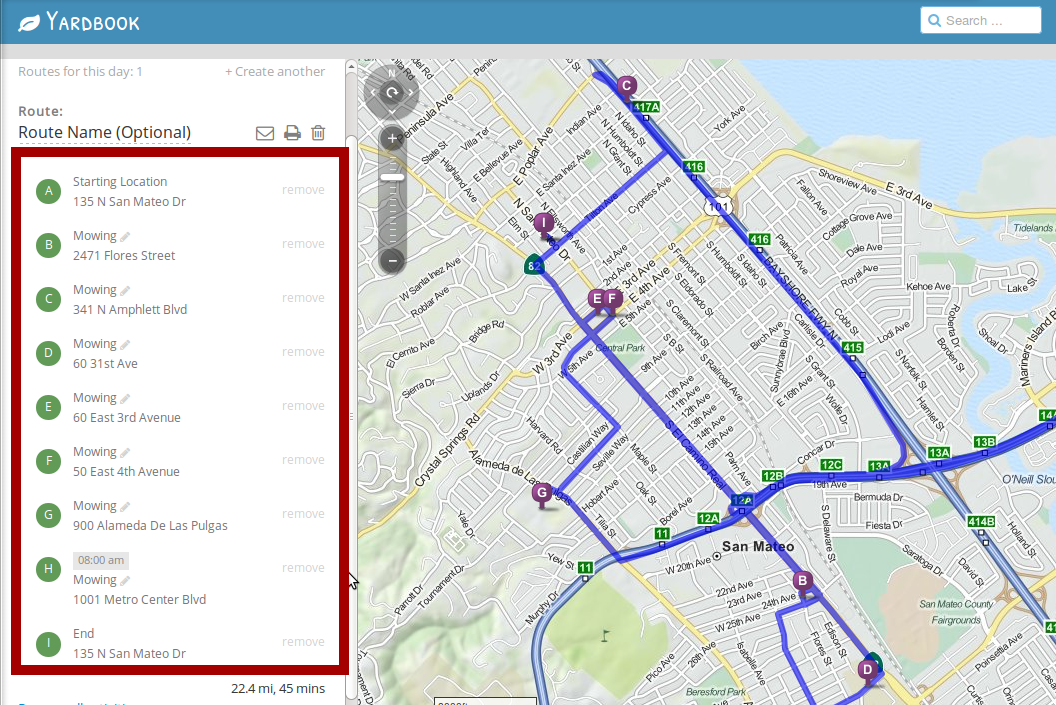
You can now begin to configure your route by using drag and drop to change the order of the Jobs. There is also a Map View on the right hand side of the page where you can see your route. When you change the order of the Jobs on the list view, you will see the Map automatically update.
There is also an optimization feature you can utilize that will automatically calculate the most efficient way to route your Jobs. Please note that each route sheet is based on a single day so you will need to create different route sheets for different days.
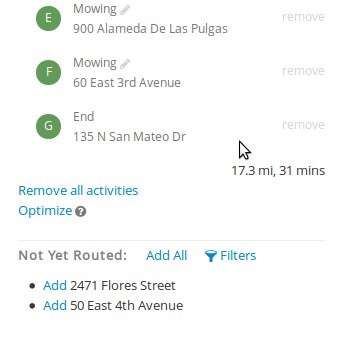
In the case of this tutorial, you have 7 jobs for the day. You can easily change the order of your jobs by drag and dropping each one on the list view. Again, the route shown in the map will update according to your Job ordering. You can also remove a Job from this route by clicking on the ‘remove’ link. If you remove a Job from a route sheet, it will be placed at the bottom of the page (in a section titled ‘Not Yet Routed’) and will be available to be added to another route sheet.
Optimize Your Route
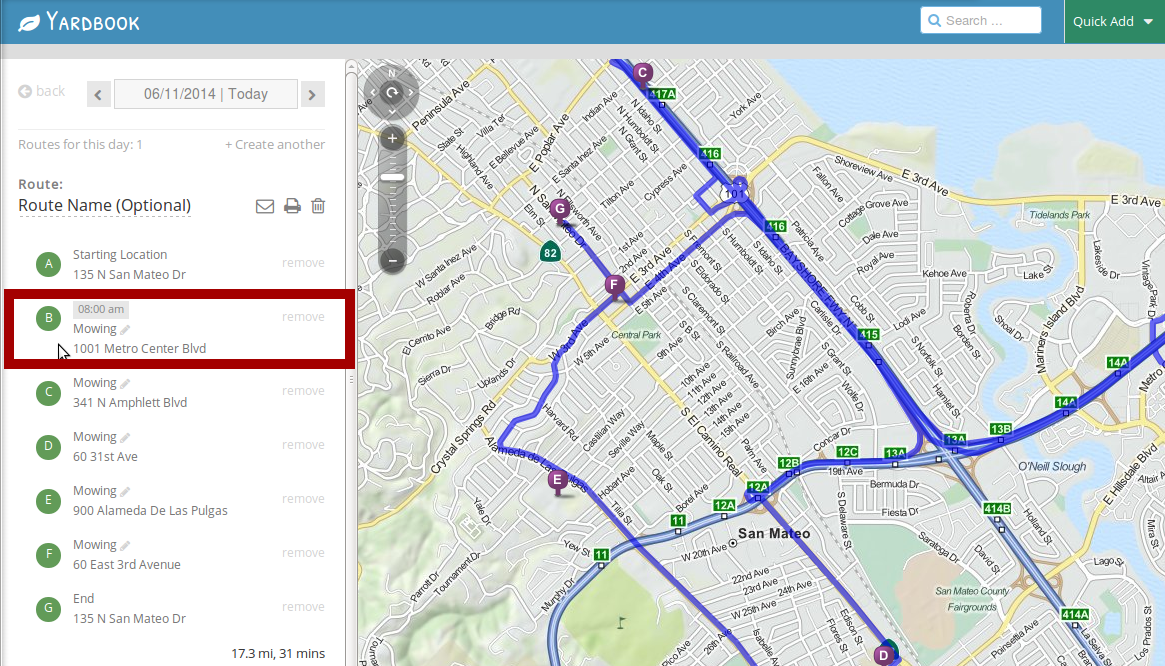
Yardbook also provides the ability for you to optimize your route based on shortest distance. To use this feature, click on the ‘Optimize’ link. As you can see, the route is now much shorter, saving you both time and gas money. One thing to be aware of is the Jobs which have a Start Time. The routing optimization feature does not take your start time into consideration, so you will need to adjust your route if you have any fixed time jobs. For example, here we have a job which starts at 8am, so should be the first job of the day.
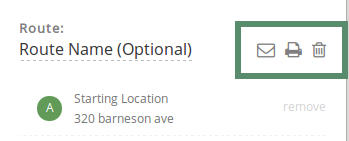
Email/Print Your Route
Once the route looks good, you can click on the print link to print it out, or you can email it to one or more employees by clicking on the email link.
Let’s click on the print link here, and you will see a PDF version of the routing sheet. As you can see, by default, all Job related details (such as address, time, customer contact info, job details) are here.
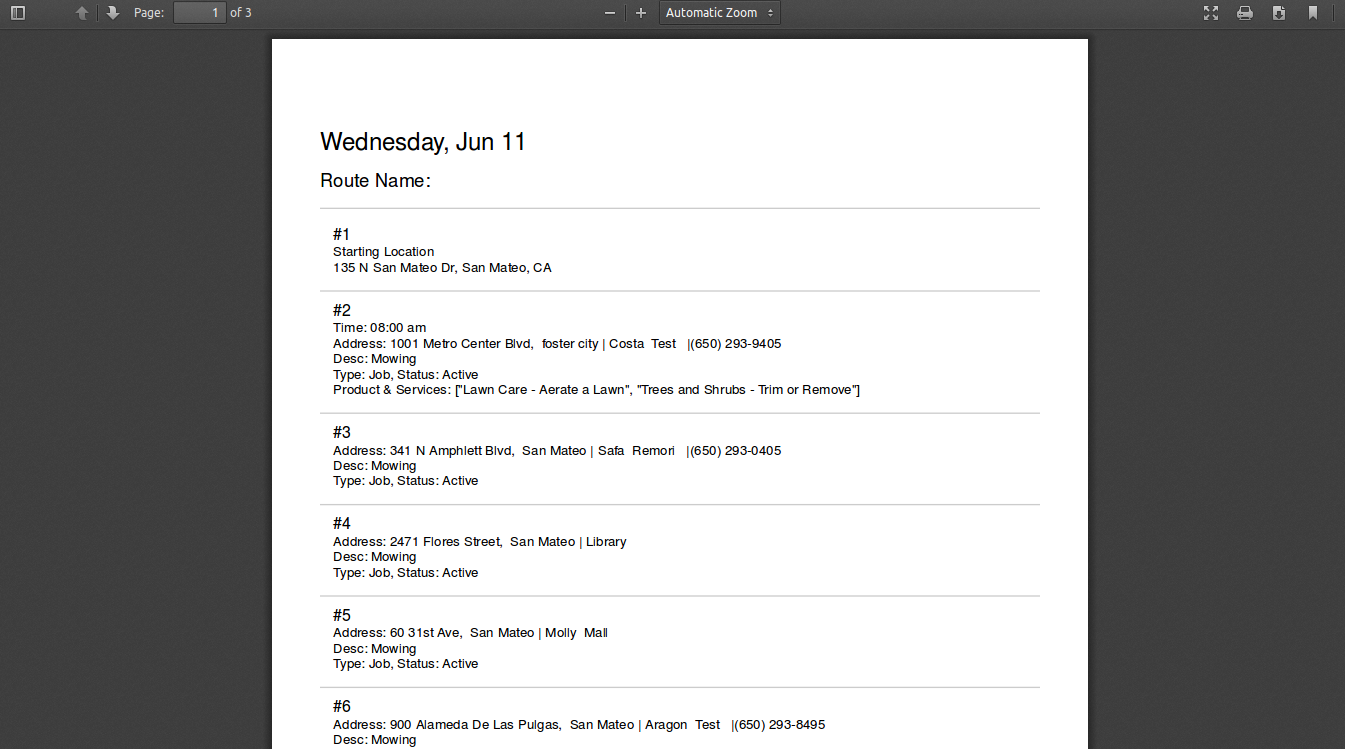
if you’d like to hide some of these fields, you can do it in your ‘Route Settings’ page.
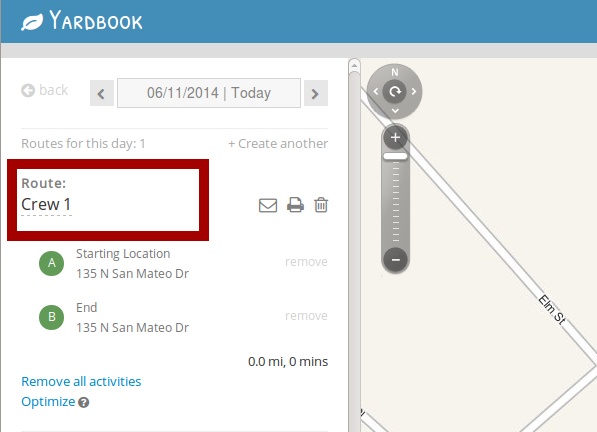
Set up Default Start/End Locations
If you’d like to include a fixed start location and finish location (ex. your home or office) for each route, you can configure it in your route settings page. Simply scroll down to the bottom of the routes, and click on the ‘Settings’ link. Here, you’ll be able to define a start address and an end address. Once you’ve set up these values, the next time you create a new route, you will see a ‘starting address’ and ‘end address’ in your route. Please note that if the starting and end Address are the same (ie. Your Office Address), you will only see the End Address Icon on the Map View.
This completes our tutorial on creating single route sheet.
Next, we’ll cover creating multiple routing sheets.
Create Additional Routing Sheets
Creating multiple routing sheets is very similar to creating a one-route sheet. The main difference is that you will not have all your jobs for that day on a single route sheet. Let’s start by creating a new route sheet. As you can see, by default, all Jobs are listed in the ‘Not Yet Routed’ Section. It is up to you to determine which Jobs go on which route, based perhaps on geographic location or which Employee or Crew you have assigned to each Job.
Let’s create our first route sheet, and name it ‘Crew #1’.
You may manually select which routes you would like to include by clicking the ‘Add’ link next to each Job. Or, if you have already assigned Employees or Crews to your Jobs, you can click on the filters link to filter available Jobs based on who is in charge of the Job, and then add them all to your routes with one click.
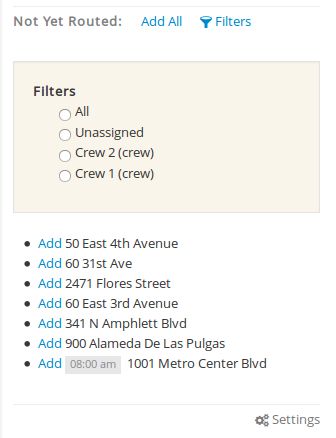
If you have not assigned these Jobs to any specific Employee or Crew, you can still add these jobs to the route one at a time. Once you have the correct jobs on a route, you can proceed to optimize your routes.
When you are done with one route, you can create the next route by clicking on the ‘Create Another’ link near the top of the page. This will create a brand new route, and you can repeat the process to create this route. There are also links on top of the List View that allow you to go back and forth between your Multiple Route Sheets.

Once all routes are defined for the day, you can click the print link, or email them directly to your employees and workers.
View all routes
You can view all of your routes in the All Routes View.
Navigate to the Sitemap -> Jobs -> View all Routes