Yardbook’s Custom Forms feature offers multiple ways to create and manage forms, providing a high level of flexibility for your business needs:
- Job-Related Forms: You can create custom forms or checklists related to specific jobs, designed for your employees to follow or complete. (Learn more)
- Non-Job-Related Forms: Use custom forms for internal purposes, such as training, onboarding, or other administrative tasks. (Learn more)
- Customer Forms: Share custom forms directly with customers through email templates. Once submitted, the form is automatically linked to the customer’s record. (See below)
- Public Forms: Create public forms that are not linked to individual customer records. (Learn more)
This tutorial will guide you through the process of creating a new custom form, integrating it into email templates, sending it to customers, and managing form submissions.
- Step 1 – Create a New Form
- Step 2 – Integrate the Custom Form into Email Templates
- Step 3 – Receive Form Submissions
Step 1 – Create a New Form
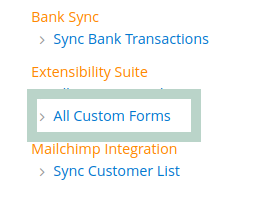
Start by navigating to the Custom Forms page:
Sitemap -> Extensibility Suite -> All Custom Forms
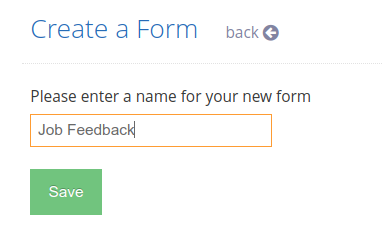
Click on the “+ Add” button. You will be prompted to enter a name for your new form.
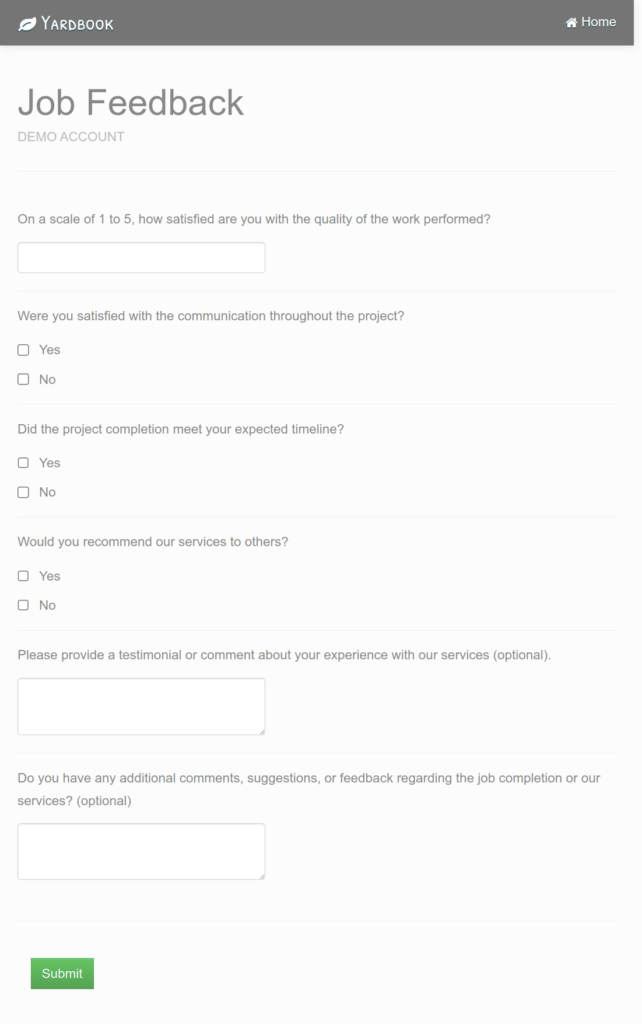
Now enter a name for your new form. For example “Job Feedback”, and click save.
You’ll be redirected to the Form Builder page. Here, you can design your form by adding questions or items.
For this example, we’ll be adding the following questions to this form.
- On a scale of 1 to 5, how satisfied are you with the quality of the work performed?
- Were you satisfied with the communication throughout the project? (Yes/No)
- Did the project completion meet your expected timeline? (Yes/No)
- How satisfied are you with the cleanup and tidiness of the work area after completion?
- Would you recommend our services to others? (Yes/No)
- Please provide a testimonial or comment about your experience with our services (optional).
- Do you have any additional comments, suggestions, or feedback regarding the job completion or our services?
Drag & drop one or more questions/items to the form canvas area. You can enter a name or a sub-label for each item and build out your form.
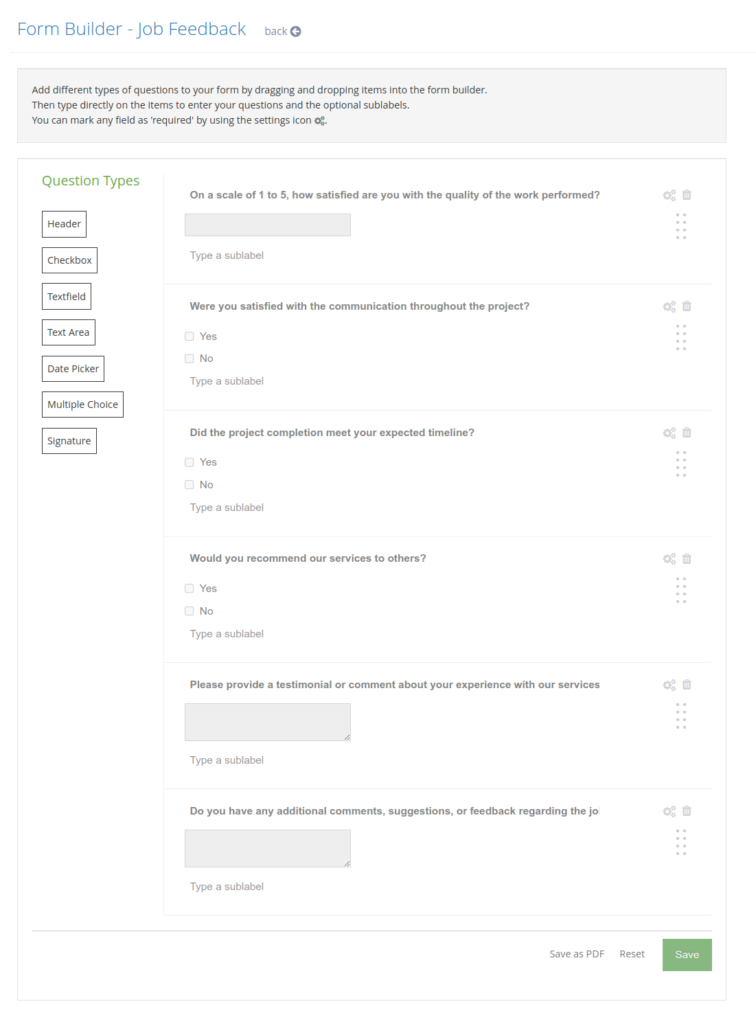
Once you are done, click on the “Save” button to save the form.
Step 2 – Integrate the Custom Form into Email Templates
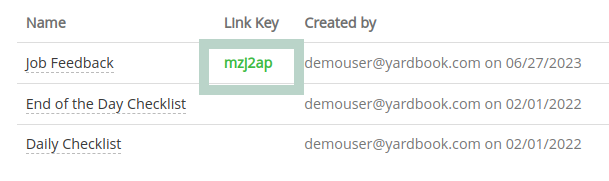
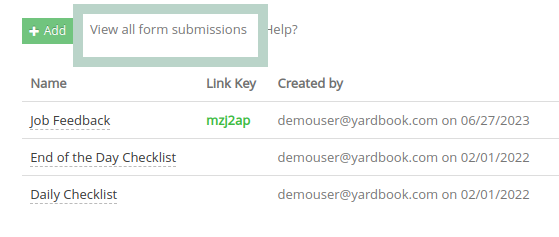
After creating your custom form, you’ll be back on the Custom Form List page.
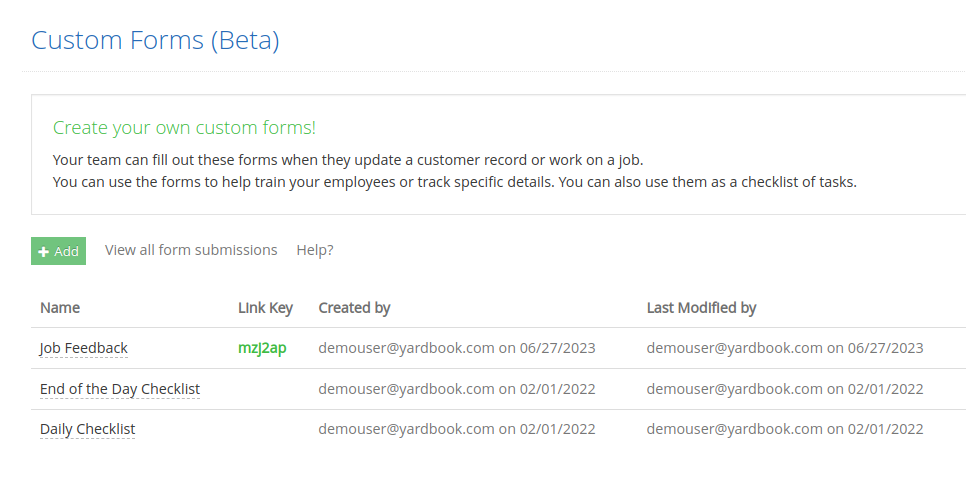
Locate the “Link Key” column and copy the key value associated with your form. This key will be used in email templates.
Navigate to the Email Templates page:
Sitemap -> Settings -> Update Email Templates
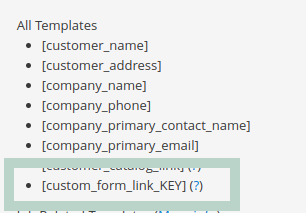
As you can use, we support a custom_form_link_KEY as a placeholder. You can simply replace the word “KEY” with the actual key value you’ve copied from the last page.
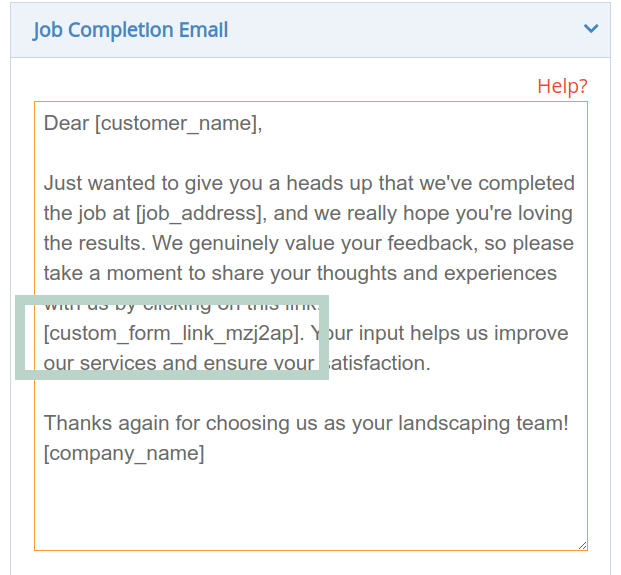
For example, if the key value is “mzj2ap“, the placeholder would be “custom_form_link_mzj2ap“.
This is the placeholder you’ll add to email templates.
In this example, our form is to gather customer feedback, so we’ll add it to our job completion email template.
Step 3 – Receive Form Submissions
When a job completion email is sent, your customer will receive a link to complete the custom form.
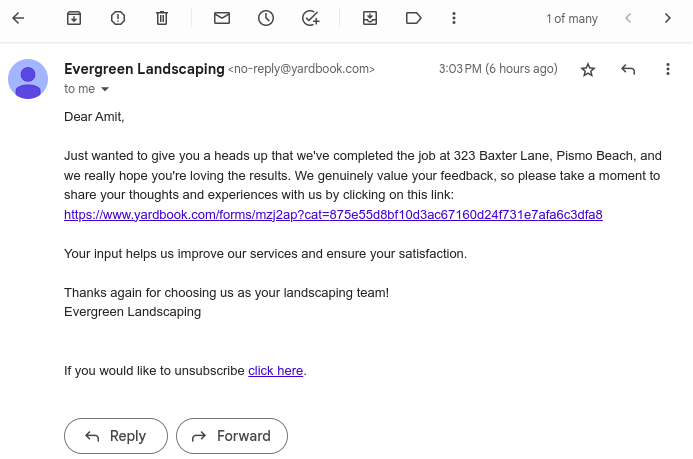
Opening this link will take the customer to your form.
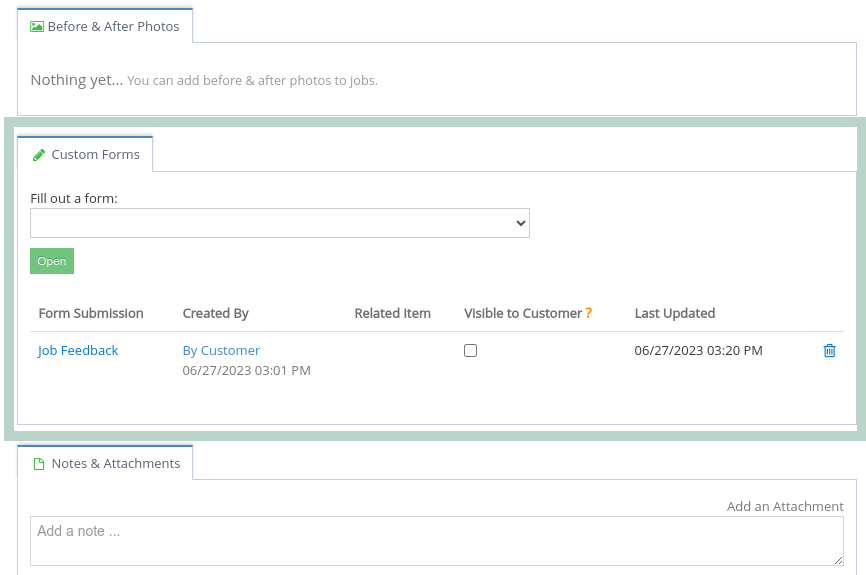
Once the form is submitted by the customer, you’ll receive an email notification from Yardbook. You can directly open the new form submission from that email.
You can view a complete list of submissions by clicking on the “View all form submissions link”. This will take you to all the responses you’ve received.
You can also check the Customer Details Page to see form submissions made by a specific customer.
The custom forms feature in Yardbook provides a powerful tool for collecting information and creating a unique experience for your customers. Feel free to explore additional examples of forms that you can use to further enhance your business.
Thank you for choosing Yardbook!