Yardbook’s Custom Forms feature offers multiple ways to create and manage forms, providing a high level of flexibility for your business needs:
- Job-Related Forms: You can create custom forms or checklists related to specific jobs, designed for your employees to follow or complete. (See Below)
- Non-Job-Related Forms: Use custom forms for internal purposes, such as training, onboarding, or other administrative tasks. (Learn more)
- Customer Forms: Share custom forms directly with customers through email templates. Once submitted, the form is automatically linked to the customer’s record. (Learn more)
- Public Forms: Create public forms that are not linked to individual customer records. (Learn more)
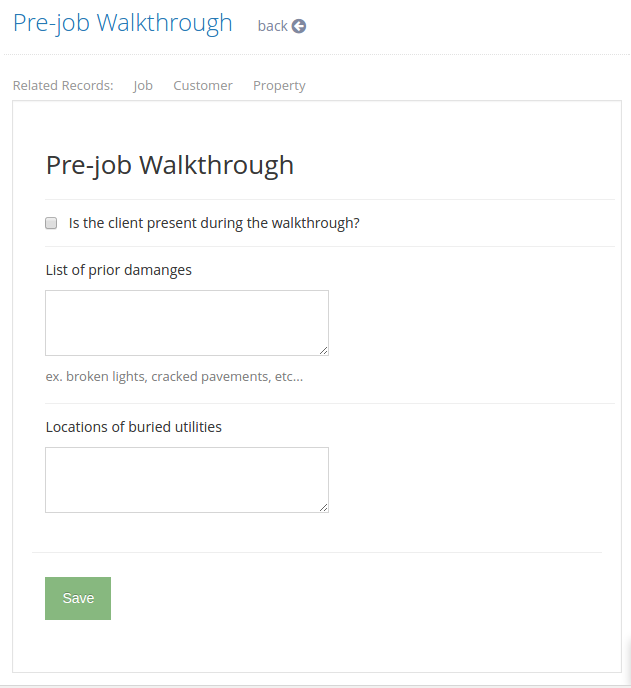
You can now create your own custom forms and have your team fill it out for various goals.
Your team can fill out these forms when they update a customer record or work on a job.
You can use the forms to help train your employees or track specific details. You can also use them as a checklist of tasks.
Create a New Form
To create a new form, first, navigate to Sitemap -> Extensibility Suite -> Custom Forms
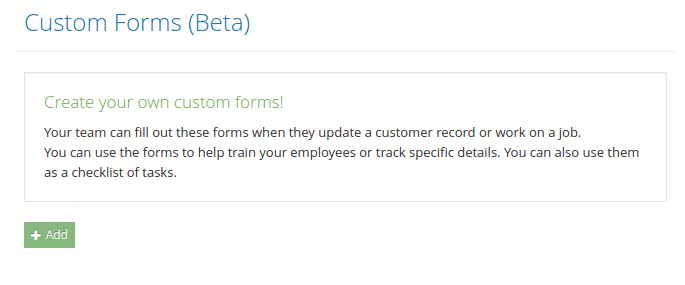
Click on the “+ Add” button. You will be prompted to enter a name for your new form.
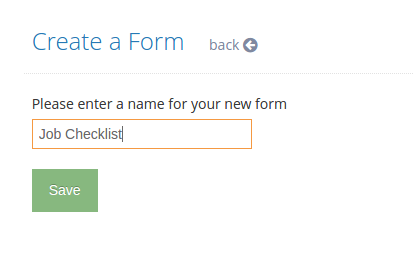
Now enter a name for your new form. For example Job Checklist, and click save.
Now you will be taken to the Form Builder page.
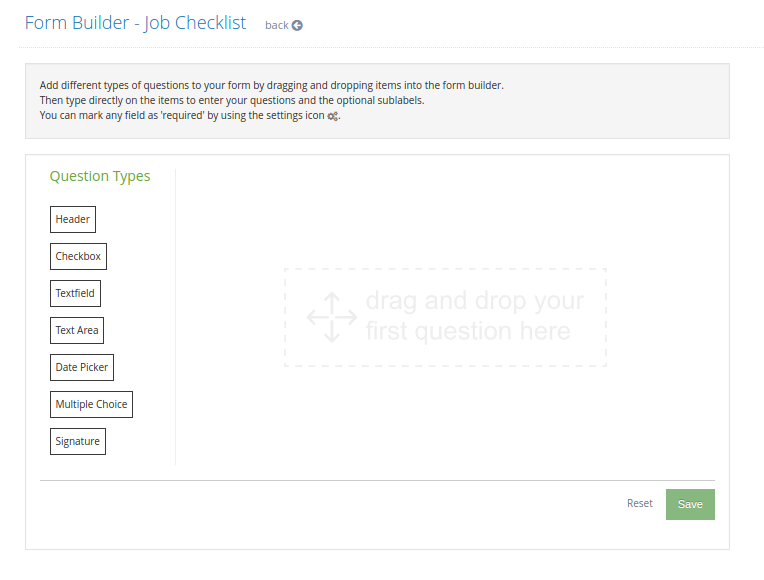
Drag & drop one or more questions/items to the form canvas area. You can enter a name or a sublabel for each item and build out your form.
Once you are done, click on the “Save” button to save the form.
That’s all. The new form will be available under various pages that allows form submissions. For example, users can fill out a form when they are on the jobs details page, or from the customer’s details page.
Over time, we plan to add form capabilities to many other pages in the system.
Different Types of Questions
You have the ability to customize and build your form using a variety of question/field types. Here is a list of different question types available in Yardbook:
- Header
- Checkbox
- Text Field – Single line text field
- Text Area
- Date Picker
- Multiple Choice – User can select one or more predefined options from the form
- Signature – Allow users to write their signature using the touch interface on a mobile phone, or through a mouse
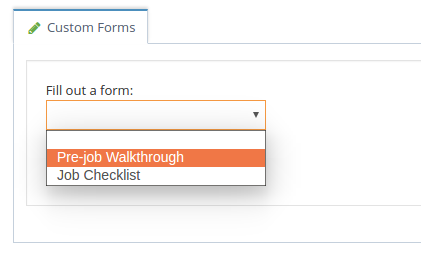
Submitting a Form
Your team can fill out a form from several different pages in the system. The way they submit their responses is the same across the different pages.
For example, employees can add a form submission from the employee jobs page.
From the job details page, scroll down to the “Custom Forms” section. Select a form you’d like to fill out.
Click on the “Open” button.

This will take you to the form submission page.
Fill out the form, and when you are done, click “Save” to submit the form.
*Note currently users can also enter a form submission from the Customer Details View and the Employee Jobs Page.
Create Stand-alone Forms
In our latest release, we’ve added the ability to create stand-alone forms. More info here.