This feature is currently in beta. Please contact our support team for early access.
Yardbook’s new feature allows you to collect deposit payments seamlessly during the estimate approval process. This guide will walk you through setting up and managing deposits for your estimates. This feature requires a Stripe account to be linked to your Yardbook account.
Set up a Deposit for an Estimate
First navigate to the Estimate Details page, click on the “Actions” menu and select the “Add Deposit” option.

This will take you to the “Add a Required Deposit” page.
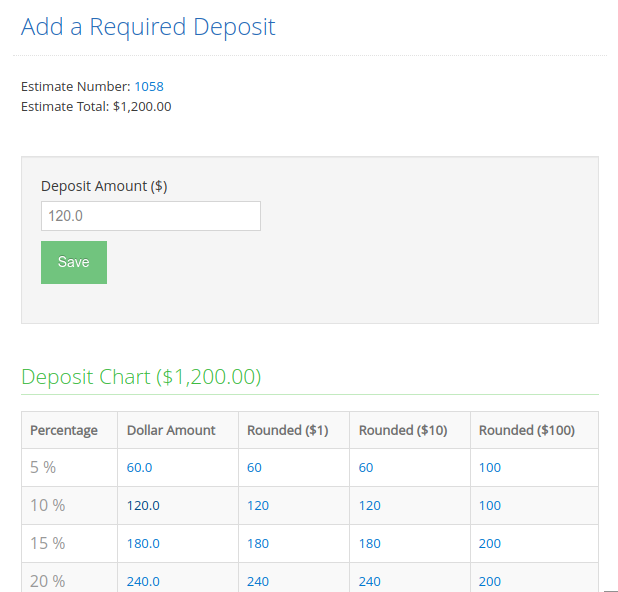
Here, you can manually enter a deposit amount, or select one of the pre-calculated amounts by clicking on a value from the chart.
Once you’ve entered an amount, click “Save”.
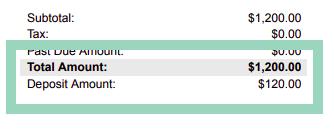
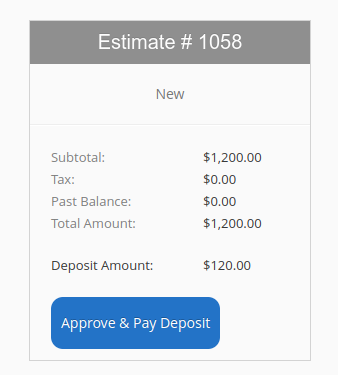
As you return to the estimate page, you’ll now see the deposit amount listed on your estimate.
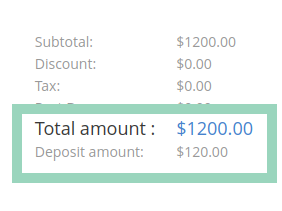
This amount will appear on both online estimates and the PDF version.
Online Estimate Page
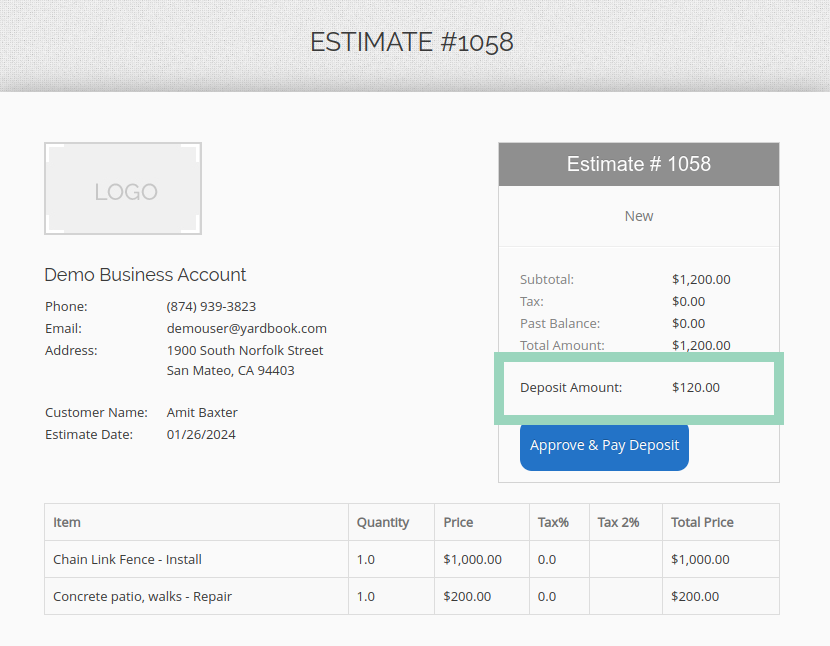
Estimate (PDF Version)
Customer Approval and Deposit Payment
When your customer receives your estimate via email for online approval, they will also see a button to “Approve and Pay Deposit”.
Note: The button is visible if the Approval feature is enabled and Stripe is linked.
Customers can click to approve the estimate.
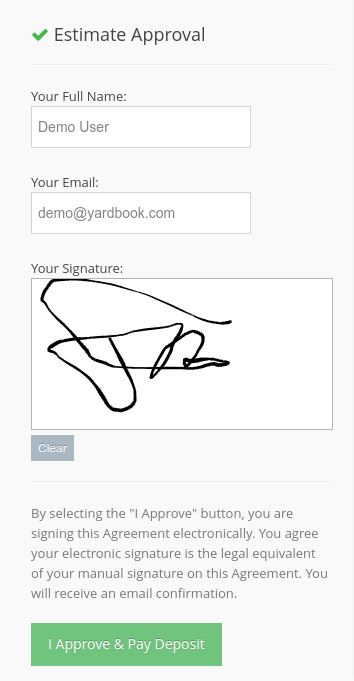
After filling out the approval form, they will proceed to make an online payment.
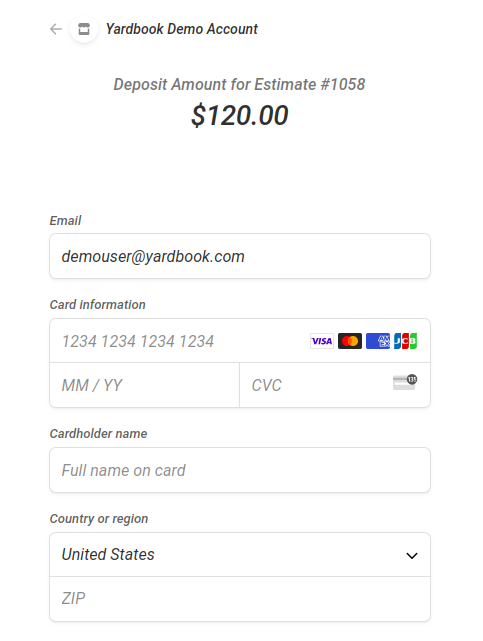
Upon successful payment, both you and the customer receive email notifications. Customers also receive a copy of the estimate showing the paid deposit amount.
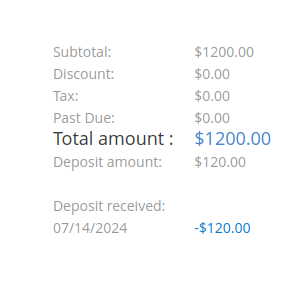
When you open the estimate, you’ll see the updated approval status, and that a payment has been made.
Admin View:
Client View:
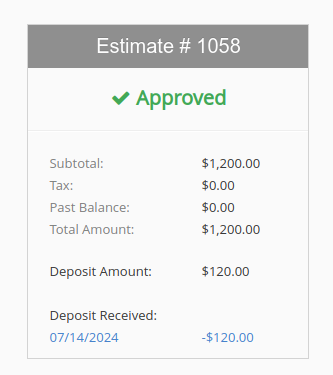
You will also find a related credit for this payment, which will be applied toward an invoice in the future.
Note: For users who have enabled passing your credit card fees to your customers, or charge a $3 convenience fee for online processing, these options are only available from your online invoices, and will NOT be applied for the deposit payments made from your estimate page.
Refund a Deposit Payment
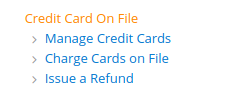
At some point, if you need to refund a payment, you can go to the “Issue a Refund” page.
Sitemap -> Credit Card on File -> Issue a Refund
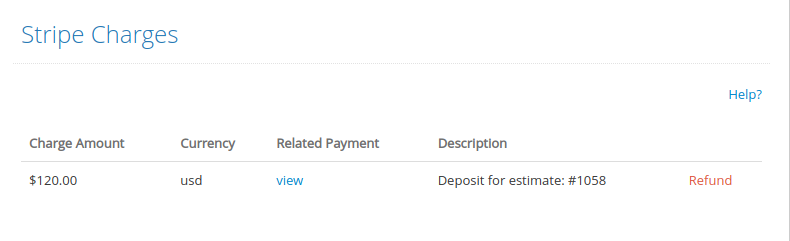
Process the refund by clicking on the red “Refund” link.
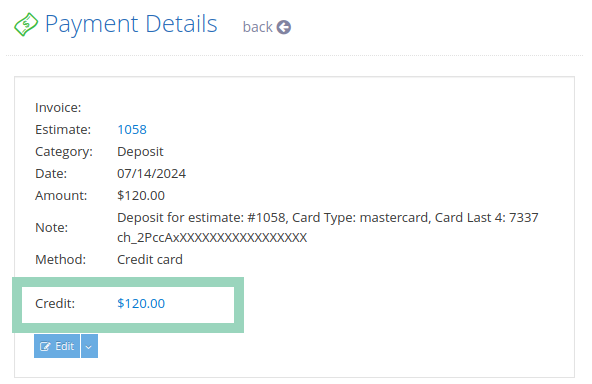
Once your refund is processed successfully, you can delete the related credit. Click on the “view” link to open the payment record.
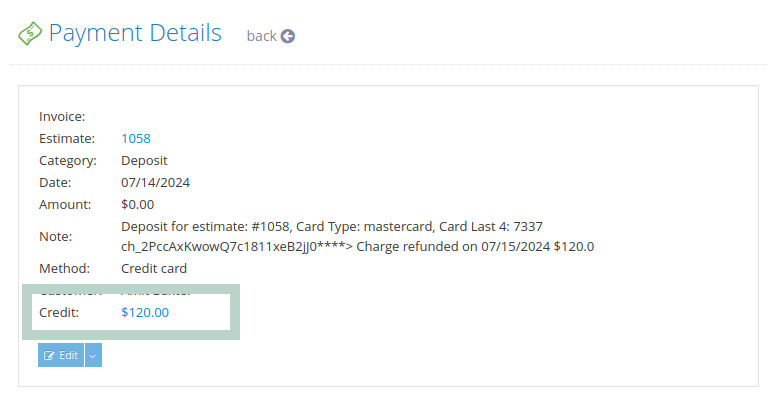
Then click on the credit amount link to open the Customer Credits page. You will be able to delete the corresponding credit amount from that page.