Admins can review, approve or reject timesheets created by the team members. Once a timesheet has been approved, it will become read-only. If it has been rejected, the user will have a chance to modify that timesheet record and re-submit if needed.
Approve Multiple Timesheets
First navigate to the employee’s timesheet view.
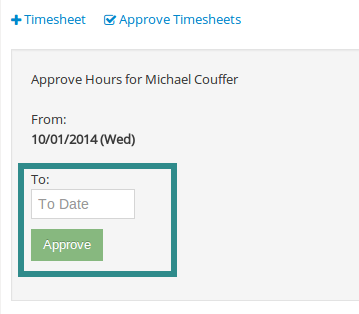
After reviewing the timesheets, and once you are ready to approve all active and pending timesheets, click on the “Approve timesheets” link.
Then select an end date for which you’d like to approve the timesheet. Note, by default the start date is based on which “Date Range” you have chosen on your Timesheet View.

Once an end date has been selected, click on the “approve” button to approve all the timesheets which falls into the time range.
Reject a Timesheet
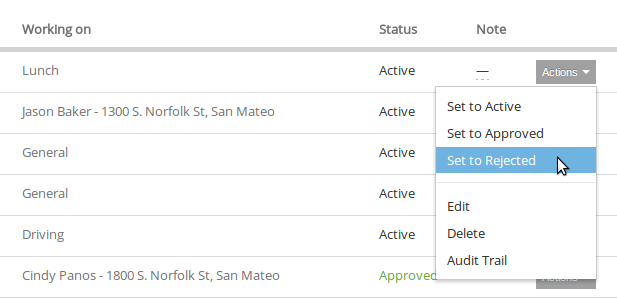
When you are in the Employee’s Timesheet view (see above for navigation), you can set the approval status of individual timesheets by using the “Actions” menu.
Select “Set to Rejected” to reject a timesheet.
Note: After a timesheet has been rejected, the user will have a chance to modify that timesheet record and re-submit if needed.


