Quick Dispatch lets you create multiple jobs at once by building a list of properties to dispatch, then applying services/products, assigning a crew, and choosing a start date.
What Quick Dispatch creates
When you run Quick Dispatch, Yardbook creates:
A new set of Jobs – one job per dispatched property, based on the services/products you add
A Route – for the scheduled date
Route Items – for each dispatched property (in the same order as your dispatch list)
Choose how to build your dispatch list
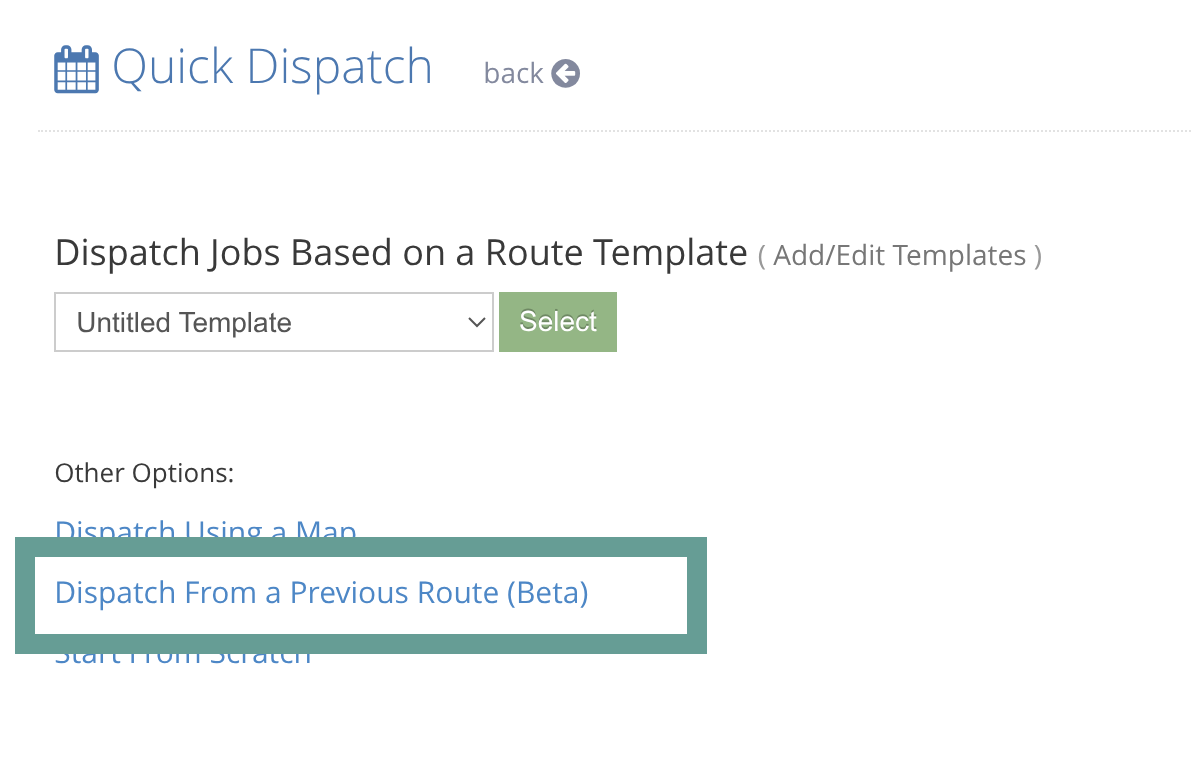
There are five ways to select the properties you want to dispatch:
- Dispatch from a Route Template
- Dispatch from Scratch
- Dispatch using a Map
- Dispatch from a Previous Route — pick an existing route and dispatch those properties in the exact same order
- Dispatch based on the last service date
Option 1: Dispatch from a Route Template
Create Route Templates
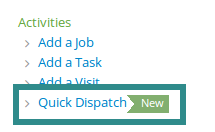
First navigate to the Quick Dispatch view from your Sitemap.
Then, click on the “+ Template” link.
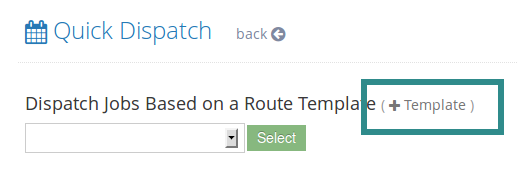
This will take you to the Route Templates page. Click on the “+ Add” button.
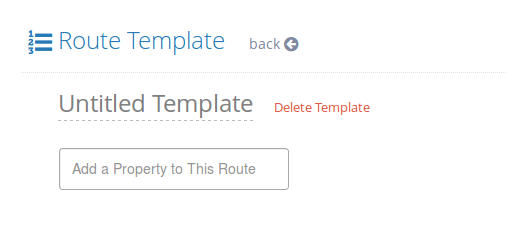
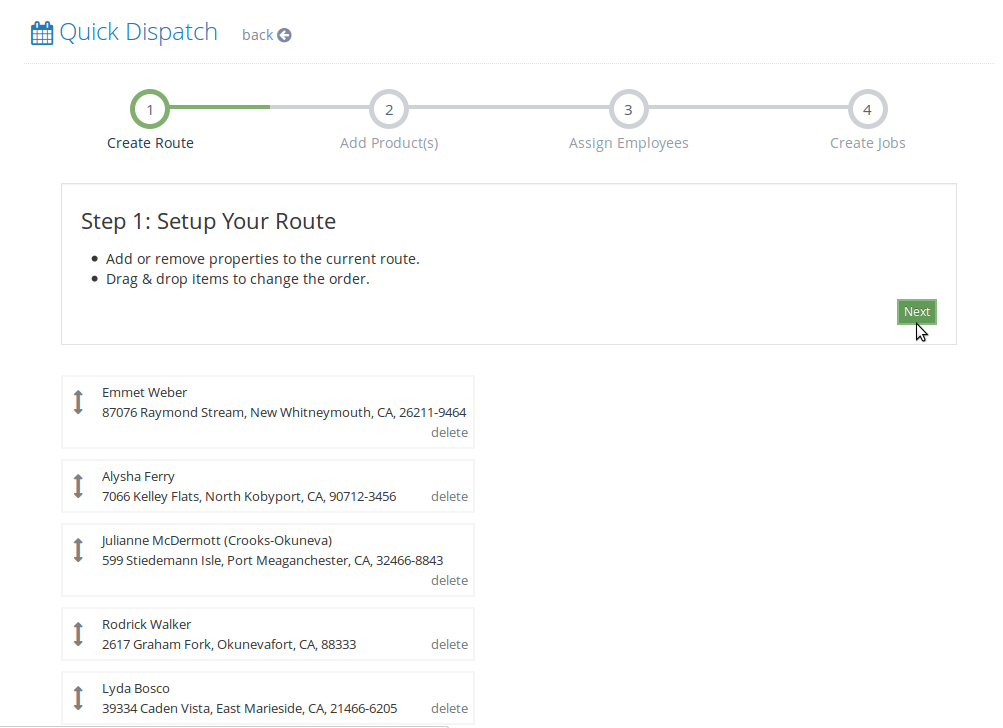
Enter a name for your template (ex: “Snow Route 1”) and add a few properties to this route. You can also drag and drop route items to re-position them in the route.

Once this is done, you are ready to dispatch jobs.
Start a dispatch using your template
Navigate to the Quick Dispatch page through your Sitemap view.

You will see your template (ex: “Snow Route 1”) in a drop-down list. Click “Select” to start the dispatch process.
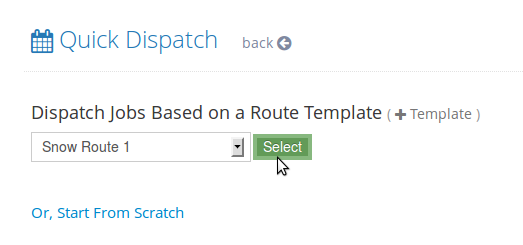
The Quick Dispatcher will copy the properties from the template into your dispatch items list. You can re-position these properties if you’d like. Once you’re happy with the order of the dispatch items, click “Next”.
Then continue to Complete the Dispatch section below.
Option 2: Dispatch from Scratch
Use this option when you want to build a dispatch list without using a saved route template.
- Navigate to Quick Dispatch from your Sitemap.
- Choose Dispatch from Scratch.
- Add/select the properties you want to include in this dispatch.
- Drag and drop items to adjust the order (optional).
- Click Next.
Then continue to Complete the Dispatch section below.
Option 3: Dispatch Using a Map (New)
Use this option when it’s easier to select properties visually.
- Navigate to Quick Dispatch from your Sitemap.
- Choose Dispatch Using a Map.
- A map will display all properties.
- Select the properties you want to dispatch directly from the map.
- Confirm your selection to build your dispatch items list.
- Adjust the order if needed, then click Next.
Then continue to Complete the Dispatch section below.
Option 4: Dispatch From a Previous Route (Beta)
Use this option to reuse an existing route and keep the exact same property order.
Navigate to Quick Dispatch from your Sitemap.

Choose Dispatch From a Previous Route (Beta).
This will take you to the Route List View. Select an existing route and click on the “Dispatch Again” link.
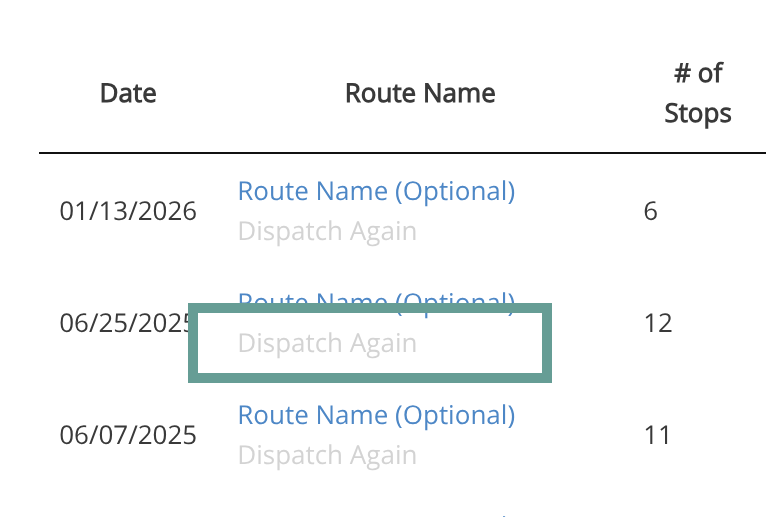
Quick Dispatch will build a new dispatch list using the same properties in the same order as the selected route.
Review the dispatch list, then click Next.
Then continue to Complete the Dispatch section below.
Complete the Dispatch (Shared Steps)
No matter which option you used to build your dispatch list, the remaining steps are the same:
Step 1: Add services or products
In the next step, you can add services or products from your catalog. Start typing a product name and Yardbook will show a matching product in the drop-down list. In this example, we will select “Snow Plowing”. Click the “Add to Jobs” button.
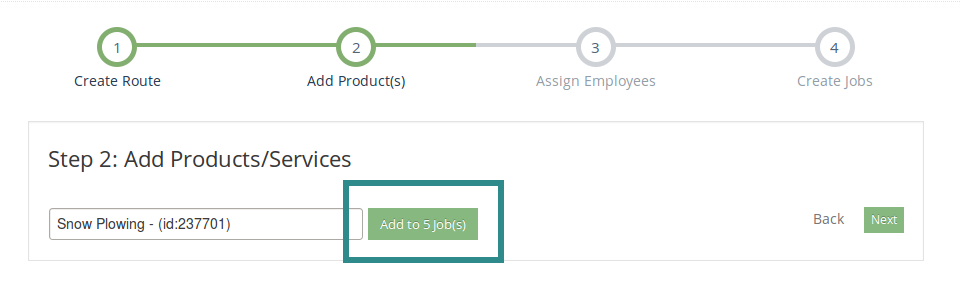
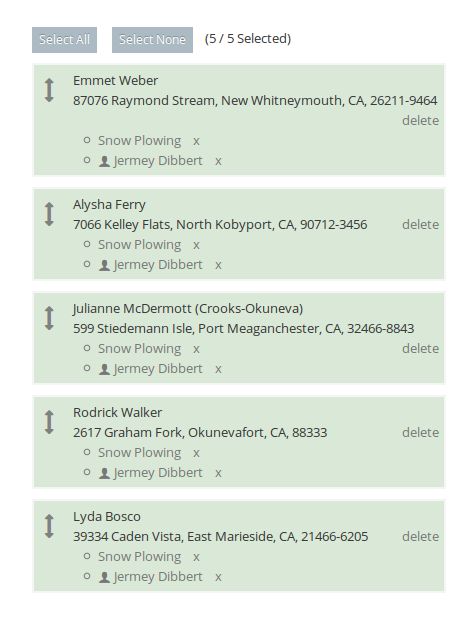
You can verify that the service has been added to your dispatch items in the list below.
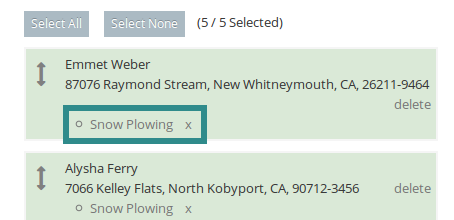
Note: The product/service will only be added to selected items, which are highlighted in green. You can continue to add other services to some or all dispatch items. Once you are done, click “Next”.
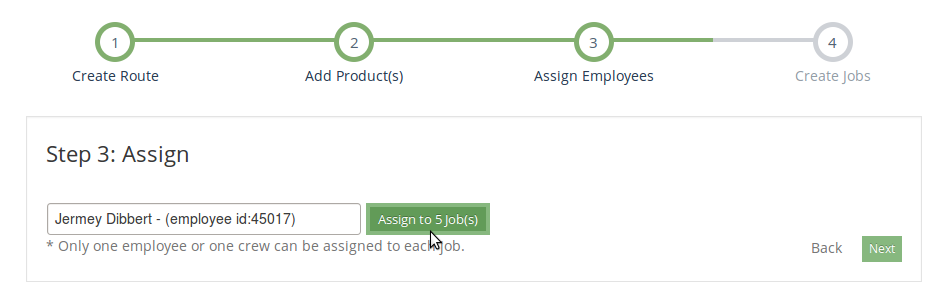
Step 2: Assign an employee or crew (optional)
In the next step, you can assign an employee or a crew to these items. If you don’t manage any crews, you can skip this step and click “Next”.
Step 3: Choose the date
Finally, enter the date for which the jobs will start.
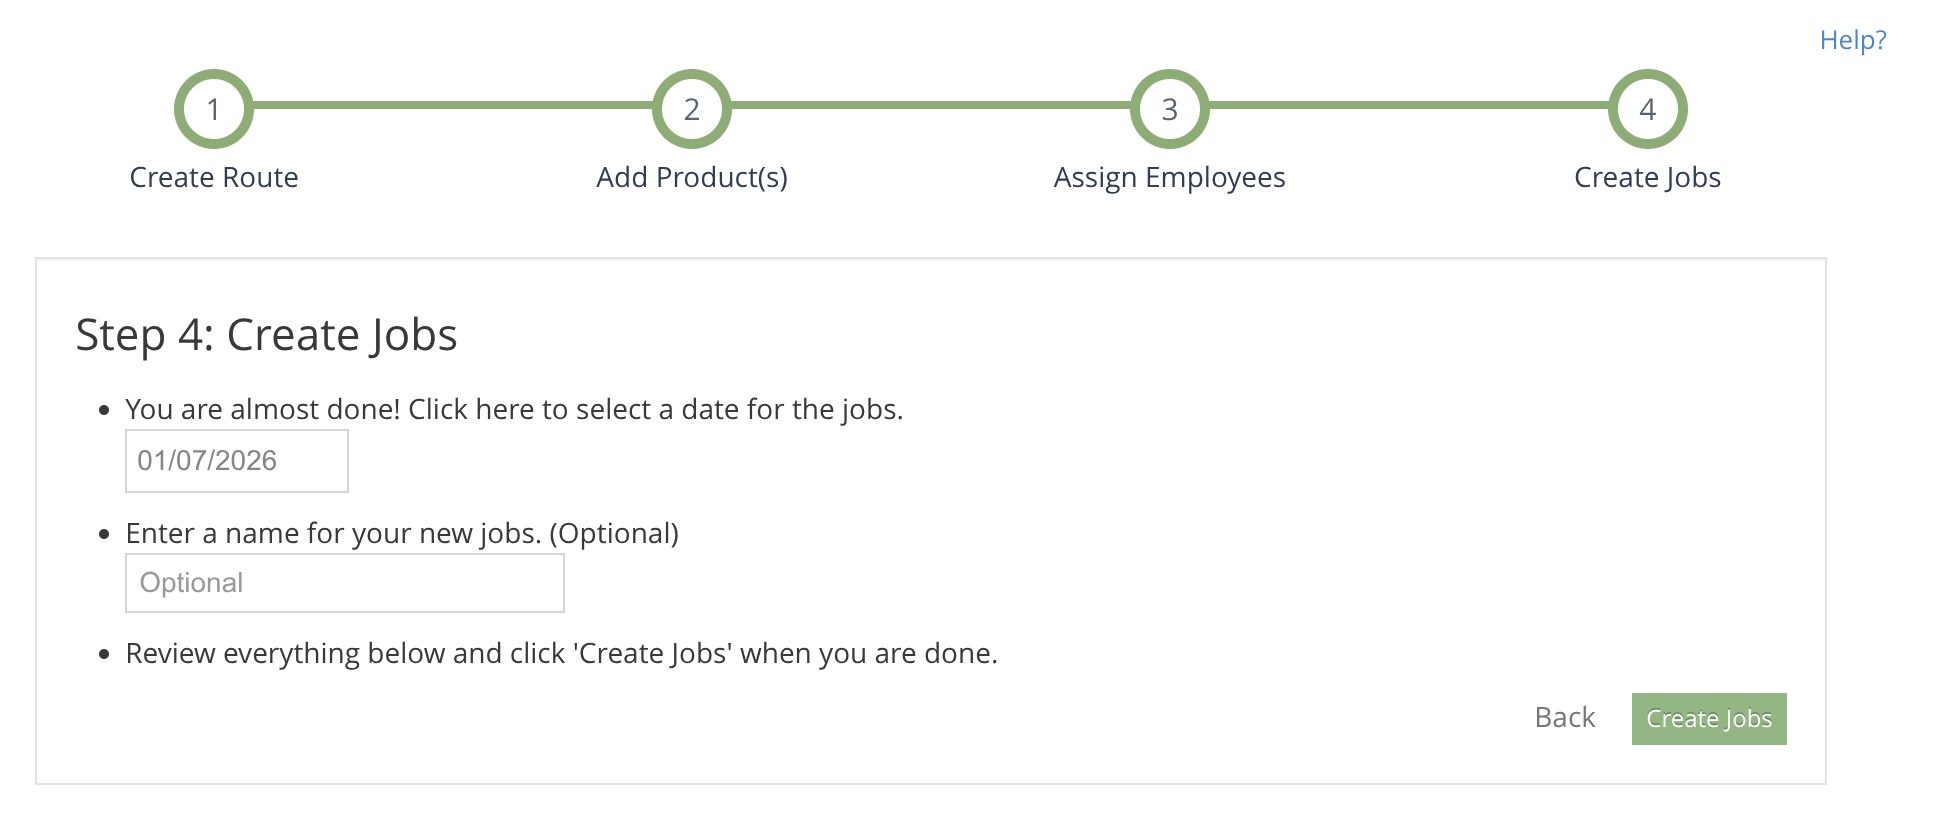
It’s also a good idea to review all dispatch items in case you’ve made a mistake.
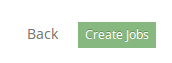
When you’re ready, click the “Create Jobs” button.
What happens next
At this point, your dispatch is processed (usually within a couple of minutes). Once everything is done, you will get an email notification from Yardbook.
When you return to the Jobs View, you will see the newly created jobs (you may need to refresh/reload the page).
In addition, Quick Dispatch creates a Route for the scheduled date containing route items for each dispatched property. You can see the route in the All Routes view (accessible from your Sitemap).
Each route item is linked to the job that was created for it.
Generate Invoices
Quick Dispatch creates jobs which are billable. It works well with the Auto Generate Invoice process. Also, if you have set up property-based pricing, Auto Generate Invoice will leverage the pre-defined pricing for your services.
Link to Auto Generate Invoice FAQ
Important note if you use Recurring Jobs
Quick Dispatch is designed for batch-creating jobs (and the route + route items that go with them).
If you’re using Recurring Jobs outside of Quick Dispatch, those jobs are already created automatically on your schedule. In that workflow, you typically don’t need Quick Dispatch—instead, you’ll just want to build your route directly for the day using the jobs that already exist.
A simple way to think about it:
- Recurring Jobs = jobs are created automatically → you route what’s already there
- Quick Dispatch = you want to create a new batch of jobs right now → it creates the jobs + route + route items